Showing posts with label DIY. Show all posts

Tuesday, March 29, 2011

DIY Library Bag


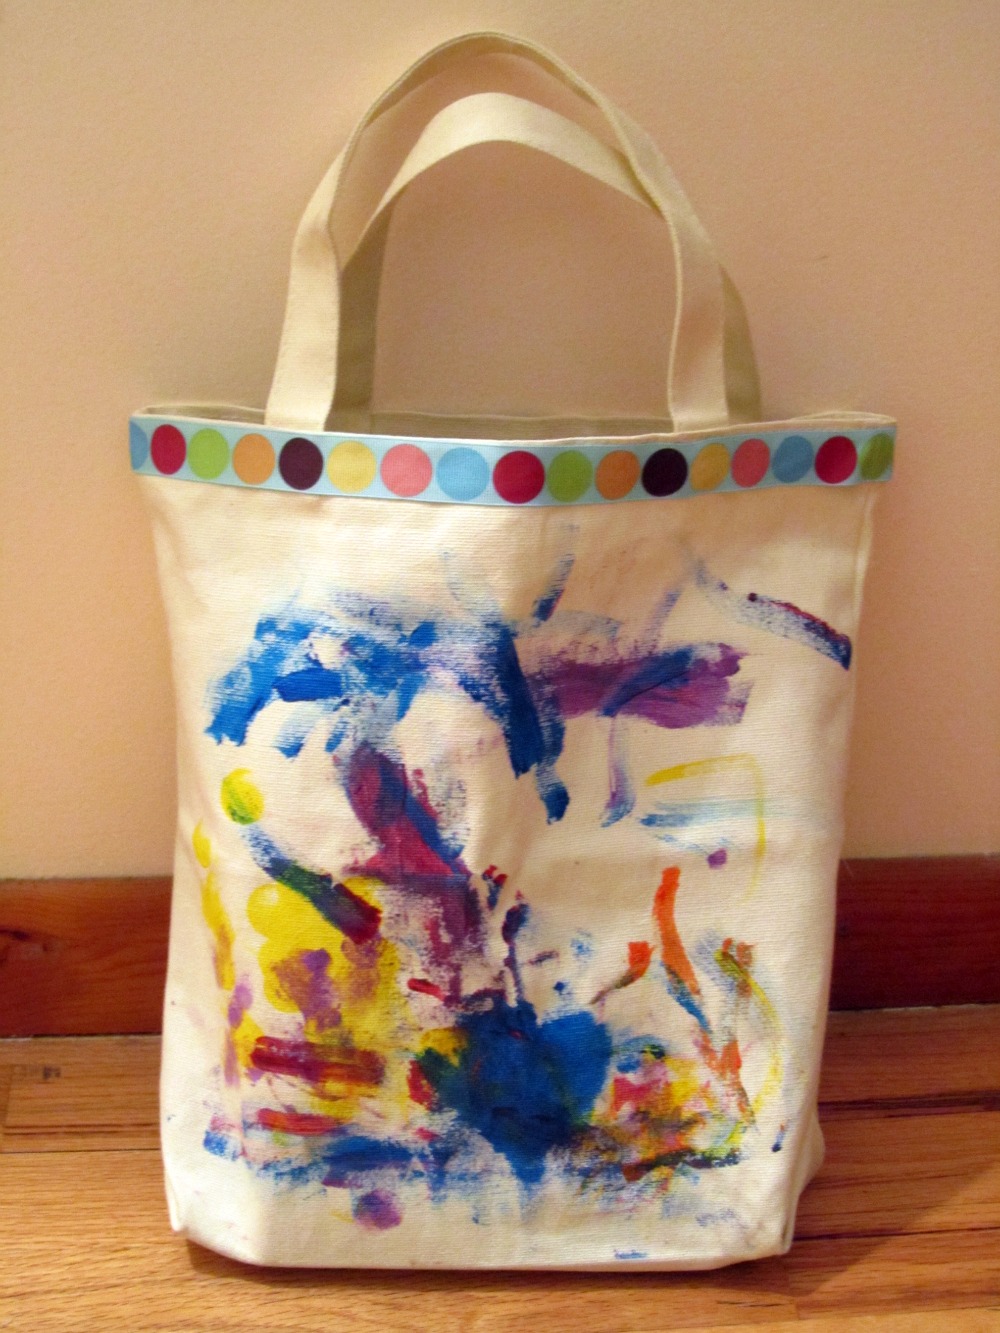
About a month ago I took Charlotte on her first trip to our local public library. It was a total success and she loved looking at all of the books and picking out a few to take home. When it was time to check out the books, Charlotte wanted to carry them to the car. I didn't have a bag so the librarian handed us a plastic bag. My girl carried the bag all the way to the car. I knew I needed to have a special bag for our library trips. At the same time that we began going to the library, Charlotte began painting. I thought this would be a great opportunity for her to put her own personal touch on something. I bought some acrylic paint, cheap paint brushes, and a canvas bag and let her go crazy.

I taped plastic bags down for a drop cloth. I always have an excessive amount and thought this would be a good way to reuse them.

Here's my girl at work. Sorry it's blurry. I was having issues. :)

After she was done with her "masterpiece" and it had plenty of time to dry I sparingly applied some hot glue around the top edge of the bag and attached some ribbon. I truly wanted this bag to be something that Charlotte had "designed" so on a trip to Hobby Lobby I had her pick out a spool of ribbon that she liked and that was the ribbon I used.

Once I had attached the ribbon I decided that I wanted to add an inside pocket to keep our library card in. For this step I used random pieces that I had laying around. I used fabric and ribbon that was left over from my Memo Board, a random button, Charlotte's ribbon, and some hemp cord. I forgot to take pictures as I went but I basically just hot glued ribbon around the edges so that I wouldn't have to sew anything. It wasn't until I was done with the ribbon that I decided to add the button. The card didn't fit as snug as I would have liked and I was afraid that it would get lost.


I'm so proud of the art work that my peanut creates and love being able to carry it around. Not only does it make me smile but it also makes my girl happy. I love hearing her say things like "Mommy, I did that." I want her to be proud of the things she creates and I definitely think that allowing her to carry her painting around with her will help build her self confidence.


 What crafts have you done with your children lately?


Wednesday, March 23, 2011

DIY Memo Board

Hello, hello! I am finally able to share with you all, my DIY memo board. I had mentioned in my post on Monday night that I wanted to share a Before & After with you yesterday. Unfortunately, I didn't pull through. I decided to embellish the board a bit more than I had originally intended to do which required more time. Sometimes I'm not sure whether my plethora of ideas is a blessing or a curse. I get so many thoughts running through my mind I'm not sure what to choose. In the end I went with something much brighter and more playful than my original plan.


For a while now, I have found myself looking for somewhere to stick ideas, paint swatches, and other pieces of inspiration. The perfect solution for this was the not-so-original idea of a memo or bulletin board. I didn't want to go out and purchase one but rather decided that I should just make one from an old framed picture we had laying around the house. Someone had given it to us and it was just collecting dust in the spare bedroom.


This first thing I did was remove the paper backing. Once that was done I began removing the staples that held the picture in place. To remove the staples I just wedged a Flathead screwdriver in between the staple and the frame and lifted the staple out.


I worked my way all around the perimeter and ended up with a mess that looked something like this...


Neat is something that I most definitely am not when I get working on a project. Things are more fun when they're messy! After I was able to separate the frame from the picture and glass I lightly sanded the entire piece. Once I was done sanding I wiped it down with soapy water and allowed it time to dry. Once it was dry I coated it with two coats of Claret Wine in a Satin Finish. I didn't bother to prime the piece because I don't expect it to endure that much wear and tear. Also, I like when things look a little bit beat up. Gives them character.  After spraying the frame I move to make the actual bulletin board. Now I had contemplated buying real cork board to cover with fabric but because I am cheap  frugal I stuck with my original plan and just used cardboard.


The frame already had one piece of cardboard that was used for the backing but I wanted to reinforce it with another layer to ensure that any tacks stick. I had a empty cardboard box laying around so I cut it down to pieces that would fit the original piece. Once I had all of my pieces cut I used tape to attach the pieces to the front piece and moved onto attaching my fabric. I used a hot glue gun and worked my way around the edges.


For the fabric I used two layers of cotton that I got at Joann's for around $4 a yard. I tried to find a pattern to use but wasn't able to find something I loved. I think I'm glad I used a neutral fabric because it will give a better backdrop to my other pieces of inspiration.


When I reached the corners I simply folded the fabric flat and glued it down flat with hot glue. Once both pieces of fabric were secure I cut 4 pieces of white grosgrain ribbon to place 3 inches from all the edges and attached with hot glue on the back of the cardboard. I did not flip the piece over for this because I wanted to ensure that the ribbon stayed straight. I simply placed a dot of hot glue on the end and lift the board to flip the glued edge under and held it for a minute until it was secure.


I hadn't planned on adding any further details to the board but looking at it almost put me to sleep! It was so boring. That is when I decided it need something else. This is going to be placed in my office/crafting area so it needed to be more creative and inspiring, not boring! I made a trip to Walmart and picked up more grosgrain ribbon and some colorful flowers meant for scrapbooks.


Now that is more like it! The last step was to just place the board inside the frame and secure it with either staples or tape. I'm not going to lie to you. I have yet to actually secure the board in place but I am going to be out of tonight tomorrow night and I was too anxious to share my end result.


I can't wait to hang this up above my desk and place some pieces of inspiration up there along with pictures and whatever else pops into my head! It will definitely be put to good use!

What do you think? Do you use a bulletin board or do you have other ways for keeping track of things?


Monday, March 21, 2011

Taking A Risk: Painted Cabinet Style

Today over at The Nesting Place there is a linky party going on! It's about taking risks. This honestly couldn't have come at a more perfect time for me. Lately, I have been taking plenty of risks (for me anyways!). Two weeks ago I (finally) started this blog. I have been considering doing this for many, many months but kept being too chicken to take the plunge. I wasn't sure that I was capable of doing it. Now it's two weeks later and I already can't quite figure out why I waited so long. What did I have to lose?

Aside from starting this blog, I have taken other risks such as, ripping down cabinets as a first step to revamping my kitchen. The second step I took was partially influenced by The Nester's post regarding taking risks in your home. After reading her post I made this comment on her blog...


...and stayed true to my word! The next day I went to town painting my laminate countertops, which you can read more about here. I had planned on linking up to the party with that post but I dove into yet another project in my kitchen. (I'm feeling motivated!) Painting my kitchen cabinets!

I have never loved our cabinets. There is nothing functionally wrong with them but I was never a fan of them. When we first moved in I tried to convince myself into liking them by changing the hardware to Oil Rubbed Bronze knobs but it didn't help. I even toyed with the idea of just changing the backsplash. After almost a year of living with them my feelings haven't changed.


I have wanted white cabinets since before we even owned a home. The Hubby isn't overly fond of white cabinetry but agreed to letting me paint them in an attempt to make our kitchen more aesthetically pleasing. After reading this post over at Centsational Girl's I thought I would put Rustoleum's Cabinet Transformation's to the test.


I purchased the kit from my local Home Depot and had it tinted to Pure White. According to Rustoleum they recommend using two coats of the tinted base. The above picture is after the second coat. This obviously won't do. Onto a third coat. If any of you are familiar with this product you know that it does not cover painting the interior of the cabinets. Unfortunately, this cabinet requires that the interior be painted because it has glass doors. (This is definitely the only time that I have considered it unfortunate to have glass doors! I love them for displaying my dishes and stemware!)


This is definitely a very slow and tedious process, despite not having to sand or prime my cabinetry. I spent my Friday night watching Fried Green Tomatoes and Waitress while deglossing cabinets for approximately 5 hours and I didn't even finish! I was hoping to have the cabinets painted by the end of the weekend but because I am going solo on this project it just didn't happen. Hopefully by weeks end I will have my kitchen functioning again!

At this point I'm not sure whether my risk is going to pay off or not. I'm sure hoping that it will. Hopefully I can share my success with all of you soon!

PS- I'm hoping to share a Before & After tomorrow so make sure to drop by!

Thursday, March 17, 2011

My First Rendezvous with Refinishing

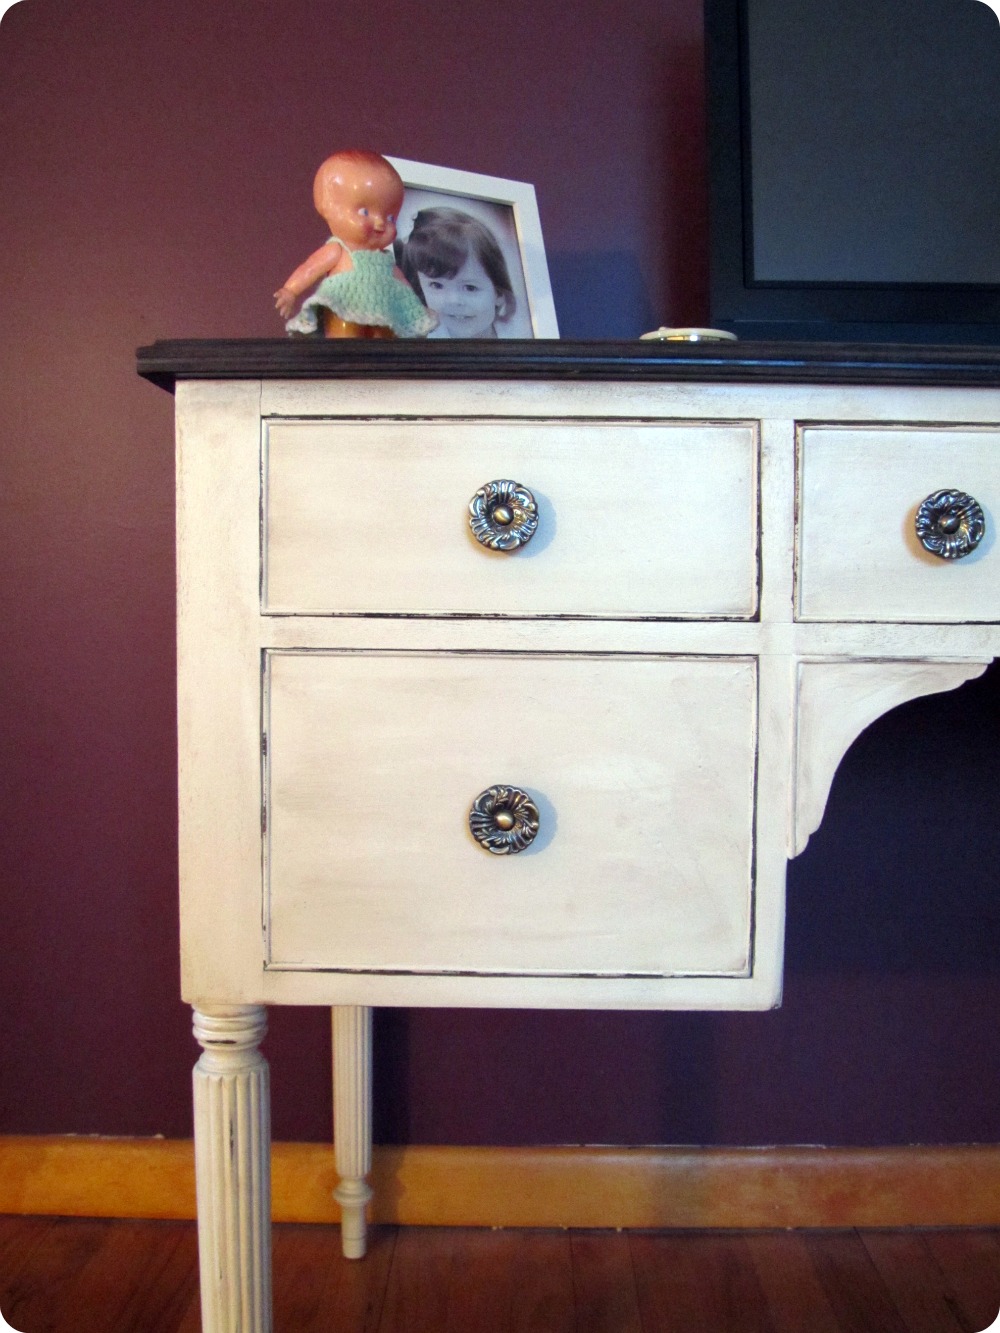
Hi All! I'm keeping it short and simple today. It's Furniture Feature Friday over at Miss Mustard Seed's so I'm linking up for the first time. I'm so excited to finally be participating after sitting on the sidelines for so many months! Want to know what I'm linking? Here's a peak but be sure to read on to see the rest!


Several months ago I purchased a desk off of craigslists to place in our loft/office area. The desk had great details but the finish was very worn and needed some TLC. Amongst all of my excitement to get started on my very first refinishing project I never snapped a before picture. Bummer! (Sadly this is not the only time I've done this.)  To give you an idea of what it looked like it was stained very dark and had an Art Deco finish.  Typically Art Deco is not my thing but for some reason this piece totally pulled it off.

I had originally planned on sanding the entire piece and restaining but quickly realized that I did not have the patience time or tools for such a job at that point. I pondered for a while after deciding against sanding the entire piece and finally decided to stain the top with Minwax's Dark Walnut stain and use Rustoleum's Heirloom White for the body. After envying so many transformations around blogland that featured dark stained tops and crisp white bases I decided this was my chance to try it out. Now I have to apologize for some of these pictures because they are truly craptastic. However, they are all I have to share at the moment. Here they are in all of their craptastic glory.


I personally think that despite my less than stellar photographs the desk is a true beauty. However, I may be slightly biased.


I also used the Dark Walnut stain as a glaze overtop of the Heirloom White. Once I had finished with the staining and painting I then worked through the piece and distressed some areas with sandpaper.


I replaced the old wooden knobs with these pretty Antiqued Brass knobs that I purchased at Home Depot for about 2 bucks a piece.


Overall, I am totally thrilled with how my desk turned out. In the end I believe I spent about $60 at the most to complete the entire project. Not too shabby if I do say so myself!

 I hope to make some progress on my kitchen this weekend to share with you all next week. Wish me luck!

Have a great weekend! :)

Wednesday, March 16, 2011

Updated Laminate Countertops

The progress in the kitchen has been slow but steady. However, I'm excited to say that the countertops are officially painted. I have been dreaming of Ikea's butcher block countertops but, at this point, I would rather spend the money on other things for our home. I've gotta prioritize, ya know! So what's a girl to do with ugly laminate countertops and a very tight budget? Paint! Rustoleum sells a specialty paint specific for laminate countertops. I have been pondering this thought for almost a year now but was too scared to try it. However, now that the hub and I have been discussing butcher block countertops as a possible option (we could splurge and get them if we really wanted to but why not save a few bucks!) I figure I didn't have much to lose. In all actuality if it panned out for us we could save money!


After making the final decision to go through with the project I went out to the Lowe's by my work and purchased Rustoleum's Specialty Countertop Coating. As you can see on the box, the coat may be tinted to 16 different colors. I wanted to keep the countertops relatively neutral but also complimentary to the soon-to-be white cabinets. With that being said we went with "Light Ash" which is a soft gray color. After reading up on the product I grabbed all of my other necessities. For application you will need a foam roller for a smooth finish, painter's tape for painting of your work space, and a brush with flagged ends.


Because I am a total dip, I did not buy a brush with flagged ends. Instead I used a foam "Poly-Brush" that I had on hand. It worked out for me because I didn't have many areas where brush application was needed, however, I would recommend using a proper brush for your application. I would also recommend wearing gloves, which I did not because as I said, I am a dip. The coating is extremely sticky and hard to get off. It is recommended that clean up be done with Xylene. I personally discarded my rollers and brush after use.


This is what my counters looked like prior to applying the Countertop Coating. They were a light tan color with a speckled appearance. They didn't really fit my particular taste. Here is a close up to give you a better idea of what I was working with...


It's not the most terrible thing I've ever seen but with painting the cabinets I wanted to change up the counter as well. 


As I began applying there were a few things that I noticed. 1) It was important to keep the roller moving all the way from the front to the back of the counter in a fluid motion. (This will help to reduce roller marks.) 2)Keeping the brush relatively wet seemed to help as well. If my roller got too dry it seemed to make the finish appear more spongy. 3) I should roll out the top of the counter then move to my edge to catch any drips.


I wasn't sure what to expect as far as how many coats I would need. I didn't want the surface to appear too goopy (so what if it isn't a technical term!) so I made sure my coats were on the thin side. I ended up doing three total coats and still had paint to spare. The package says 1 quart covers 25 linear feet of average sized counterspace. It doesn't mention how many coats that is for but I was able to apply three even coats and only use 3/4 of the can but we also only have approximately 12 linear feet of counter space (small kitchen!)


I did this last night and the counters can not be used for 3 days so I can't say how well they will hold up but for now I'm loving the change.


Our laminate countertops have gone from yucky speckled tan to a nice clean, chic looking gray. Here is a close up of one of the edges...

While these aren't the butcher block countertops I have been dreaming about I will say they are an improvement. Are they perfect? No. Do they work for me? Yes! Overall this project cost me 30 buckaroos. For 30 bucks I can not complain. After I have had a chance to give these babies a test drive I'll let you know how durable they truly are. I'll also have to break my habit of not using a cutting board! I know, I know. I'm bold.

All in all I'm calling this project a success. And now for good measure here is Before & After shot...


I am one satisfied girl right now! What do you think? Do you have ugly laminate counters you'd like to paint or have already painted?

Oh and I forgot to mention - Make sure you've got some windows open and any little ones in your household aren't around. This stuff was very potent. You may also want to consider wearing a mask!

Thanks for dropping by! I hope you'll visit again soon! :)

Monday, March 14, 2011

Diy Play Kitchen

Happy Monday! I hope you had a wonderful weekend! One of my best friend was home this past week for a visit so I had a wonderful weekend catching up with her. We've known each other since Kindergarten! It's unreal to me that even though we see eachother barely once a year that nothing ever changes. It just goes to show that true friendship will stand the test of time despite the distance.

Anyhow, today I wanted to share the Play Kitchen that I made for my daughter back at Christmas time. After seeing all of the wonderful Play Kitchens around blogland I knew this is something I wanted to do for my little peanut. I looked and looked to find an affordable used entertainment center with no such luck until one week before Christmas. That meant I had a very strict one week deadline. Oy vey! Talk about some pressure!

This is something that I had planned on taking several weeks but ended up squishing it into one week. Needless to say I pretty much dedicated every spare moment to this project to ensure that it would be ready for Christmas morning. Here is the before...


The entertainment center was generously given to me by a friend of my parents. They had purchased a new one and were looking to get rid of this one. It was absolutely perfect for what I had in mind. After a week of devoting myself to this project I ended up with this adorable little play kitchen.


The first thing I did was rearrange the bottom shelf pieces to make the sink and oven area even. Once that was done I primed the entire piece and then painted it. Most of the paint that I used was leftover from other various projects. In anticipation for the "sink" I used a jigsaw to cut a hole the would fit the size of my bowl. The bowl I used was also something that I had on hand from a set of mixing bowls that I had yet to use because I have multiple sets. I figured it would serve a better purpose as Charlotte's sink than collecting dust on a shelf.

Next, the doors were cut from an MDF board, primed and painted. After they had dried I attached them with hinges and magnetic closures. I also used simple stainless drawer pulls for the "fridge" and "stove" handles. To provide depth to the stove I glued another piece of MDF to the top of stove. The pot rack was a key rack that I purchased from Home Depot on one of my many trips.

Every kitchen needs a window so I dug out two picture frames I had in a closet to create a "double hung window". Once I glued the frames to the wood backing I inserted blue cardstock into the frames to give the illusion of a sky. The basket was one I had on hand and spray painted with Rustoleum's "Lagoon Blue" for added color.

I think the last two final touches are my favorite from the project. On the left hand side I painted it with chalkboard paint for Charlotte to draw on. The final detail is the window valance and sink skirt. I didn't want to spend money on fabric so I turned to some of Charlotte's old clothes. I found a nice colorful shirt that matched the color scheme of the kitchen and cut it in half. One half was used for the valance and the other the sink skirt.

I'm so happy with how this turned out and I'm glad I didn't run out and buy a cheapy plastic kitchen for her. This is something that will be around for not only Charlotte but also any children we have in the future.

Have any of you created your own play kitchen? How did it turn out?