For a while now, I have found myself looking for somewhere to stick ideas, paint swatches, and other pieces of inspiration. The perfect solution for this was the not-so-original idea of a memo or bulletin board. I didn't want to go out and purchase one but rather decided that I should just make one from an old framed picture we had laying around the house. Someone had given it to us and it was just collecting dust in the spare bedroom.
This first thing I did was remove the paper backing. Once that was done I began removing the staples that held the picture in place. To remove the staples I just wedged a Flathead screwdriver in between the staple and the frame and lifted the staple out.
I worked my way all around the perimeter and ended up with a mess that looked something like this...
Neat is something that I most definitely am not when I get working on a project. Things are more fun when they're messy! After I was able to separate the frame from the picture and glass I lightly sanded the entire piece. Once I was done sanding I wiped it down with soapy water and allowed it time to dry. Once it was dry I coated it with two coats of Claret Wine in a Satin Finish. I didn't bother to prime the piece because I don't expect it to endure that much wear and tear. Also, I like when things look a little bit beat up. Gives them character. After spraying the frame I move to make the actual bulletin board. Now I had contemplated buying real cork board to cover with fabric but because I am
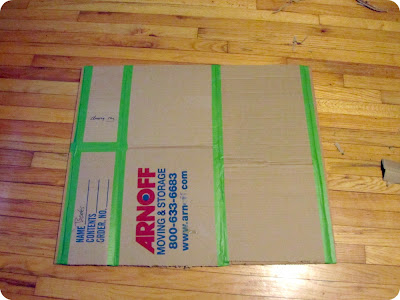
The frame already had one piece of cardboard that was used for the backing but I wanted to reinforce it with another layer to ensure that any tacks stick. I had a empty cardboard box laying around so I cut it down to pieces that would fit the original piece. Once I had all of my pieces cut I used tape to attach the pieces to the front piece and moved onto attaching my fabric. I used a hot glue gun and worked my way around the edges.
For the fabric I used two layers of cotton that I got at Joann's for around $4 a yard. I tried to find a pattern to use but wasn't able to find something I loved. I think I'm glad I used a neutral fabric because it will give a better backdrop to my other pieces of inspiration.
When I reached the corners I simply folded the fabric flat and glued it down flat with hot glue. Once both pieces of fabric were secure I cut 4 pieces of white grosgrain ribbon to place 3 inches from all the edges and attached with hot glue on the back of the cardboard. I did not flip the piece over for this because I wanted to ensure that the ribbon stayed straight. I simply placed a dot of hot glue on the end and lift the board to flip the glued edge under and held it for a minute until it was secure.
I hadn't planned on adding any further details to the board but looking at it almost put me to sleep! It was so boring. That is when I decided it need something else. This is going to be placed in my office/crafting area so it needed to be more creative and inspiring, not boring! I made a trip to Walmart and picked up more grosgrain ribbon and some colorful flowers meant for scrapbooks.
Now that is more like it! The last step was to just place the board inside the frame and secure it with either staples or tape. I'm not going to lie to you. I have yet to actually secure the board in place but I am going to be out of tonight tomorrow night and I was too anxious to share my end result.
I can't wait to hang this up above my desk and place some pieces of inspiration up there along with pictures and whatever else pops into my head! It will definitely be put to good use!
What do you think? Do you use a bulletin board or do you have other ways for keeping track of things?


No comments:
Post a Comment